An email blacklist/whitelist system is a method of managing incoming email based on a list of allowed (whitelisted) or unwanted (blacklisted) senders or domains. This system is commonly used in email filters and spam filters to block unwanted emails or prioritize important emails.
We explain here how you can set up the blacklist and whitelist with us.
I'm using the control panel
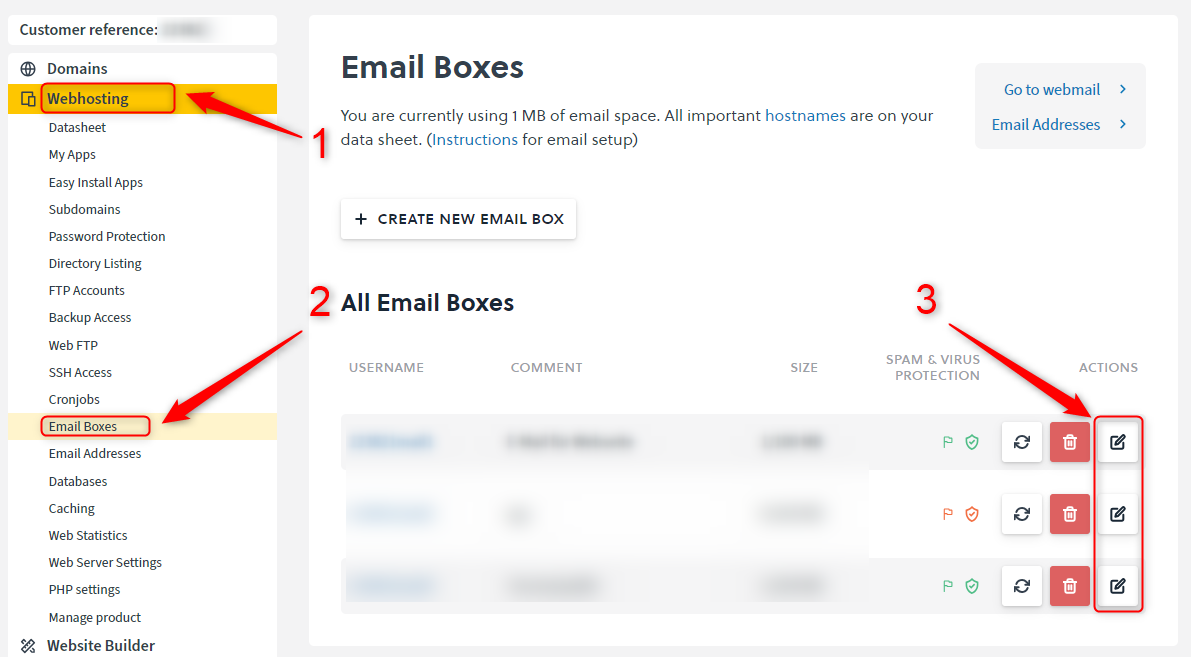
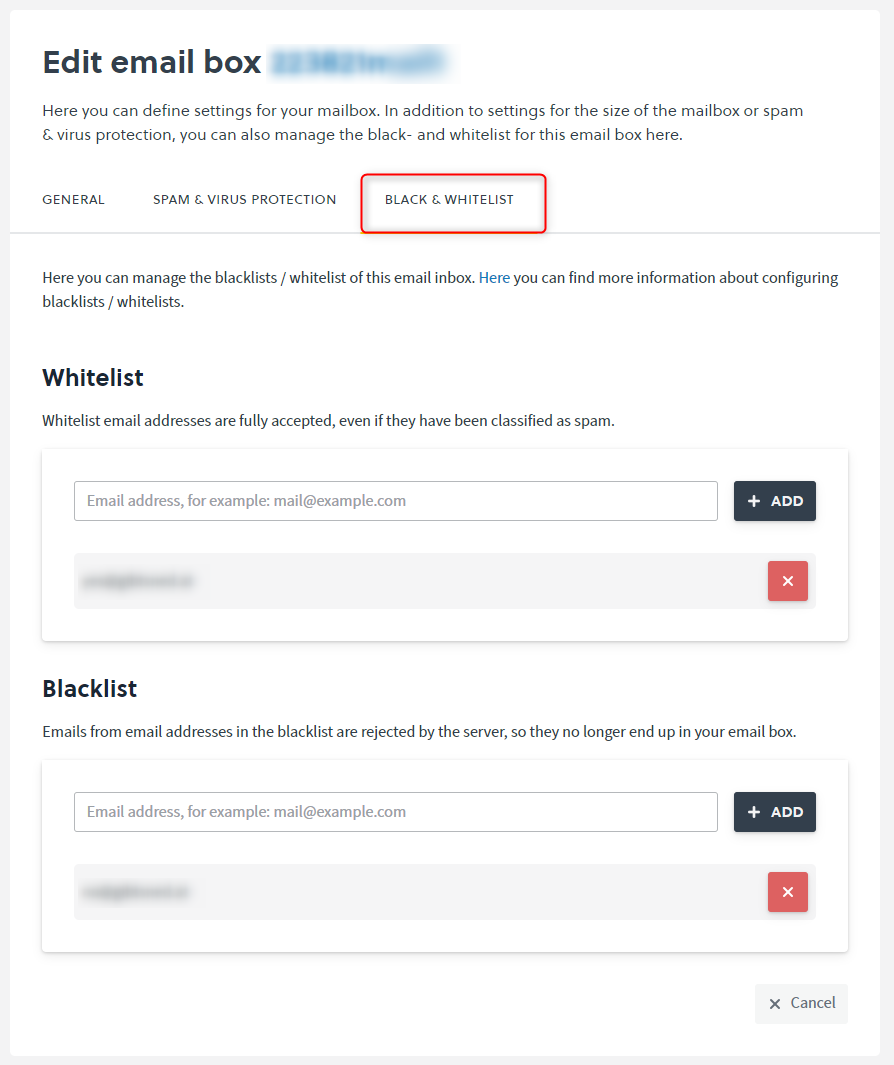
You can view the list in the Controlpanel under Webhosting and then on E -Mail mailboxes at the white Manage icon.You now have the BLACK and Whitelist tab at the top of the mailbox management.
You can either enter a single email address here or alternatively an entire domain. If you want a complete domain blacklist / whitelist you can enter the address like this: *@easyname.com.
This way you would whitelist / block all mails from easyname.
I use the Cloudpit
To set your blacklist / whitelist in Cloudpit, please log in to your web hosting administration in Cloudpit.
Once there, go to E-Mail in the tab on the left and then to Spamfilter. Here you will find all your domains which use our mail server.
You can use the Actions button to view and manage your blacklist and whitelist.
You can either enter a single email address here or alternatively an entire domain. If you want a complete domain blacklist / whitelist you can enter the address like this: *@easyname.com.
This way you would whitelist / block all mails from easyname.
Feedback on the article:
Did the article contain the information you were looking for?


